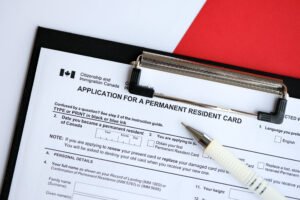
Applying for a Permanent Resident (PR) card is one of the most important steps for newcomers to Canada. But did you know that one of the most common reasons for PR card application delays or rejections is an incorrect photo? While many people choose to go to a professional photo studio, you can actually take your PR card photo at home if you do it correctly.
In this guide, we’ll walk you through everything you need to know about taking a PR card photo at home without mistakes, so your application process goes smoothly.
Why Your PR Card Photo Matters
Your PR card serves as proof of your residency in Canada, and the photo on it is a vital part of your identification. Immigration, Refugees and Citizenship Canada (IRCC) has very strict guidelines for PR card photos. If your picture doesn’t meet the requirements, your application could be delayed, or you may be asked to retake the photo.
That’s why it’s important to know the rules before snapping a picture at home.
Official PR Card Photo Requirements
Here are the key requirements you need to follow when taking a PR card photo at home:
- Size: The photo must be 50 mm wide by 70 mm high (2 inches wide by 2 ¾ inches high).
- Head size: The face must be between 31 mm and 36 mm from chin to crown.
- Background: Plain white or light-colored background with no patterns, shadows, or textures.
- Quality: High-resolution, sharp, and in focus. No pixelation, filters, or editing.
- Expression: Neutral facial expression, mouth closed, and eyes open. No smiling.
- Attire: Regular clothing. Uniforms are not allowed. Religious head coverings are permitted, but they must not obscure your face.
- Glasses and accessories: Glasses are allowed only if they don’t create glare or shadows. Sunglasses or tinted glasses are not permitted.
- Photo age: The photo must be taken within the last six months.
Step-by-Step Guide to Taking a PR Card Photo at Home
1. Prepare Your Space
- Find a well-lit room with natural lighting. Avoid direct sunlight that creates harsh shadows.
- Use a plain white wall or sheet as your background.
2. Position the Camera
- Place the camera at eye level.
- Use a tripod or ask someone else to take the photo for better accuracy.
- Keep a distance of about 4 feet (1.2 meters) between you and the camera.
3. Adjust the Lighting
- Use natural light from a window or soft lamps.
- Ensure the face is evenly lit with no shadows under the chin, nose, or behind the head.
4. Frame the Photo Correctly
- Make sure your full head and shoulders are visible.
- Leave space around your head so it can be cropped to the required size.
5. Maintain a Neutral Expression
- Look straight into the camera.
- Keep your mouth closed and avoid smiling.
6. Edit Carefully (But Don’t Overdo It)
- Crop the image to 50 mm x 70 mm.
- Do not apply filters, retouch blemishes, or adjust skin tones. Only crop and resize.
7. Print According to Requirements
If submitting a physical photo, it must be printed on high-quality photographic paper. Matte or glossy finishes are acceptable.
Common Mistakes to Avoid
When taking a PR card photo at home, avoid these errors:
- Using a busy background or shadows.
- Wearing white clothes against a white background.
- Tilting your head or shoulders.
- Smiling or having an open mouth.
- Submitting low-resolution or blurry images.
- Using digital filters or edits.
Pro Tip: Double-Check Before Submission
Always compare your final photo against the IRCC photo specifications before submitting your application. A little extra time spent checking can save weeks of processing delays.
About Max Mobile and Gifts
If you’re in Vancouver, Canada, and looking for reliable tech services, Max Mobile and Gifts is the best place for professional phone and iPhone repair services. We also offer a wide selection of accessories and gifts for all occasions, making us your one-stop shop for repairs and thoughtful finds.
Conclusion
Taking a PR card photo at home is absolutely possible if you follow the official requirements and avoid common mistakes. By preparing your space, using good lighting, and double-checking the size and quality, you can save time and money while ensuring your application isn’t delayed.
If you’d rather not take the risk, visiting a professional photographer is always a safe option. But if you’re confident and careful, your DIY PR card photo can work perfectly.